
Connecting to Zoom
For Virtual Classes and Workshops
When connecting to a Zoom meeting, by clicking on an invitation link, the platform will very clearly walk you through the necessary steps. Depending on your computer operating system the steps might look slightly different, but Zoom guides the process. Below you can see two examples of how to follow the steps for joining your first Zoom meeting.
PC example

Click on the link provided in the email to be directed to the Zoom download.

After clicking the link, the installation will appear on the bottom left. Click this to open the download.

Once the download is complete, you'll be asked to put in your name.

After clicking join meeting, you're all set! When prompted, allow zoom to use your microphone and webcam. You can turn your audio and video on and off at the bottom left of the call.
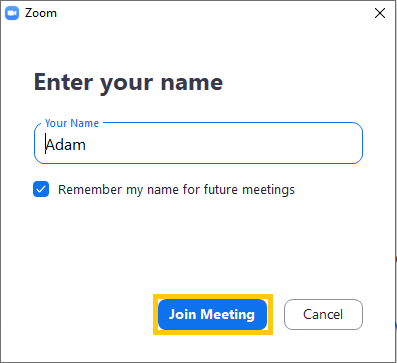
After putting in your name you can simply click “join meeting”.
Mac Example

Once you have clicked on the link provided in the meeting invitation, the installation will appear on the bottom left. Click this to open the download.

When prompted allow the package to run a program to determine if the software can be installed by clicking “continue”.

When given the option, click “join a meeting”. (You can also chose to sign in if you already have an account, however, it is not necessary to have an account to join a meeting.)

If prompted, put in the “Meeting ID” provided in the meeting invitation (just below the link you clicked on to start the process). Put in your name and click “join”.

Be sure to join the meeting with video. (You can turn the video on and off at any time later on during the meeting on the bottom left of the screen.)

Be sure to join the meeting with audio. (You can turn the audio on and off at any time later on during the meeting on the bottom left of the screen.)